Your hand embroidery can go far beyond the basics, and you are ready for it.
Ad
Have you ever finished a hand embroidery project and thought: “It looks beautiful… but something is still missing”?
That feeling is a clear sign that you are ready to evolve.
Ad
When we begin with hand embroidery, we learn the basic stitches, train coordination, and build confidence.
But there comes a moment when the desire is to go further, to create texture, depth, and a more professional finish.
Ad
If you want to transform your embroidery into something more refined, with techniques that impress in every detail, this article will show you exactly how to take that next step.
Difference Between Basic and Advanced Techniques

At the beginning of hand embroidery, we learn fundamental stitches such as running stitch, backstitch, and traditional satin stitch.
They are the structural foundation and never stop being important.
But when we talk about advanced techniques, we are talking about refined control.
The main difference lies in:
- Consistent thread tension
- Strategic stitch direction
- Color planning
- Clean finishing on the back
Basic embroidery fills spaces. Advanced embroidery creates volume, depth, and movement.
Another essential point is the smooth transition between shades.
Instead of blocks of color, advanced embroidery works with gradients that mimic light and shadow.
Professional Embroidery Stitches that Elevate the Result
If you want your hand embroidery to have a sophisticated appearance and high level finishing, some stitches are true game changers.
Rococo Stitch
The rococo stitch creates delicate and elegant volume.
It is formed by wrapping the thread several times around the needle before pulling it through the fabric. It is ideal for:
- Flower centers
- Small petals
- Organic details
The technique requires patience. The uniformity of the wraps is what ensures a beautiful and structured result.
When well executed, the rococo stitch brings a soft three dimensional effect that immediately elevates the project.
Bullion Stitch
The bullion stitch is similar to rococo, but generally longer and more structured. It creates firm rolls that can form:
- Elongated petals
- Curved leaves
- Raised details
In advanced hand embroidery, the bullion stitch adds depth and striking visual texture.
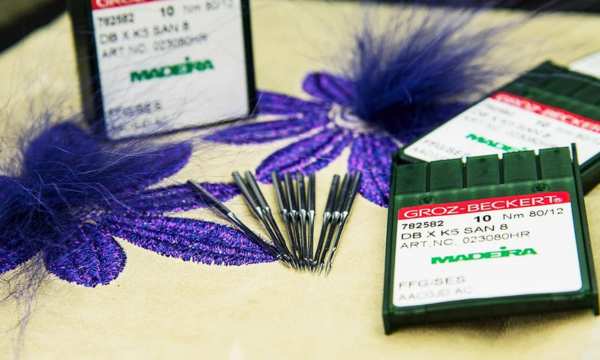
Important tip: use long, smooth needles, as this makes it easier for the wrapped thread to slide.
The choice of needle directly influences the finish.
Shaded Satin Stitch
Here we enter an artistic level. The shaded satin stitch uses a color gradient to create a light and shadow effect.
Instead of using only one shade, you work with subtle variations.
This stitch transforms embroidery into something close to painting with thread. To apply it correctly:
- Use colors that are close on the scale
- Gradually alternate shades
- Maintain a uniform stitch direction
The result is an impressive realistic effect.

Mixing Textures and How to Create Dimension
One of the biggest evolutions in hand embroidery happens when you begin to explore the combination of stitches and materials.
Mixing techniques creates visual and tactile contrast, something that completely transforms the final result.
A smoother satin stitch next to a voluminous rococo stitch, for example, already creates a noticeable difference in texture.
In addition, varying the thickness of the thread adds dimension to the work.
Thicker threads create emphasis, while thinner threads help with delicate details.
How to Create Three Dimensional Effects in Embroidery
Creating three dimensionality in hand embroidery requires planning and intention from the beginning of the project.
It is not something that happens by accident each layer, each stitch direction, and each color choice needs to be thought out in advance.
Some effective strategies include:
- Using internal padding before the final stitch, creating a raised base that will add more volume.
- Applying layers of satin stitch, overlapping threads to build gradual depth and a fuller finish.
- Working shadows at the base of the design, using darker tones in lower areas to simulate light and dimension.
- Using thicker threads in highlighted areas, directing the eye to strategic focal points and reinforcing the three dimensional effect.
The direction of the stitches also influences the perception of depth.
When you combine light, shadow, and relief, the embroidery stops being flat and comes to life.
Flowers seem to leap from the fabric. Leaves appear to curve naturally.
Applications of Advanced Embroidery in Clothing and Decoration
Advanced hand embroidery can transform simple pieces into unique items.
You can apply sophisticated techniques to:
- Denim jackets
- Dresses
- Basic shirts
- Bags
- Cushions
- Decorative frames
The difference lies in the professional finish. In clothing, it is essential to keep the back clean and protected.
In decorative frames, you can be bolder with texture and layering.

Common Mistakes in Advanced Embroidery and How to Avoid Them
When trying to elevate your embroidery, some mistakes are common. Among the main ones:
- Excessive tension that wrinkles the fabric, leaving the work uneven and compromising the final finish.
- Lack of color planning, which can result in disharmonious contrasts or loss of depth.
- Inadequate needle choice, making stitch execution more difficult and affecting thread flow.
- Skipping preliminary tests, increasing the risk of mistakes that could have been avoided with a simple trial on scrap fabric.
- Strategic planning is fundamental.
Before starting a complex project:
- Test stitches on scraps
- Simulate color combinations
- Adjust tension
These small precautions prevent frustration and greatly improve the final result.
How to Take your Embroidery to the Next Level
If you truly want to evolve, focus on three pillars:
- Intentional practice, dedicating time not only to embroider, but to train specific stitches.
- Study of advanced techniques, seeking to learn new stitches and combinations.
- Observation of professional references, analyzing details of experienced work.
Challenge yourself with projects that require mixing stitches and applying shading. Do not be afraid to make mistakes.
Each attempt refines your perception and coordination.
Over time, you begin to develop your own style, and that is the true next level.
Taking your hand embroidery to the next level does not mean abandoning the basics you already master.
It means refining every detail, improving the finish, and adding new layers of technique.
Try a new stitch in a small project. Test shading with subtle variations of color.
And if you want to keep evolving, explore our other content to discover techniques, inspiration, and details that transform every stitch into art.